For web developers, creating intuitive and interactive user interfaces is essential to providing a great user experience. One feature that significantly enhances the user experience is drag-and-drop functionality. This feature allows users to manipulate elements on the screen in a natural and interactive way. In this article, we will explore the HTML Drag and Drop API and how to implement it in a web project.
Why Drag and Drop?
There are a multiple scenarios where a drag-and-drop like feature is needed in a web application.
For example, a website builder may have a list of elements in a side panel that can be dragged from this panel to the main canvas area to complete a layout. Another example can be a sortable table of items similar to a “To-Do” list where a user can reorder their tasks from most important to least important. Lastly, a lot of applications will allow users to upload files by dragging a file from their desktop into a designated drop area that is setup to receive file uploads. Now that we have an idea of why such a feature can be useful let’s dive into how to implement it.
Understanding Drag-and-Drop in Web Applications
At its core, the Drag and Drop API is a built-in browser feature that allows applications to support the dragging and dropping of HTML elements. The API provides a set of seven different event types such as drag, dragstart, dragover, dragenter, dragleave, dragend, and drop that enable developers to create flexible drag-and-drop experiences. By leveraging these events, developers can define how elements behave when dragged, or while dropped during the DragEvent lifecycle.
The API is intuitive to understand, for example, the dragstart event fires when the user initiates a drag operation and the dragend is initiated when the dragging of the element has ended. A list of all the events and their descriptions can be found here. The important thing to note here is that to enable the Drag And Drop API we need to make sure the draggable items have the draggable attribute defined. The rest of the setup then requires performing actions based on the drag events that are now available.

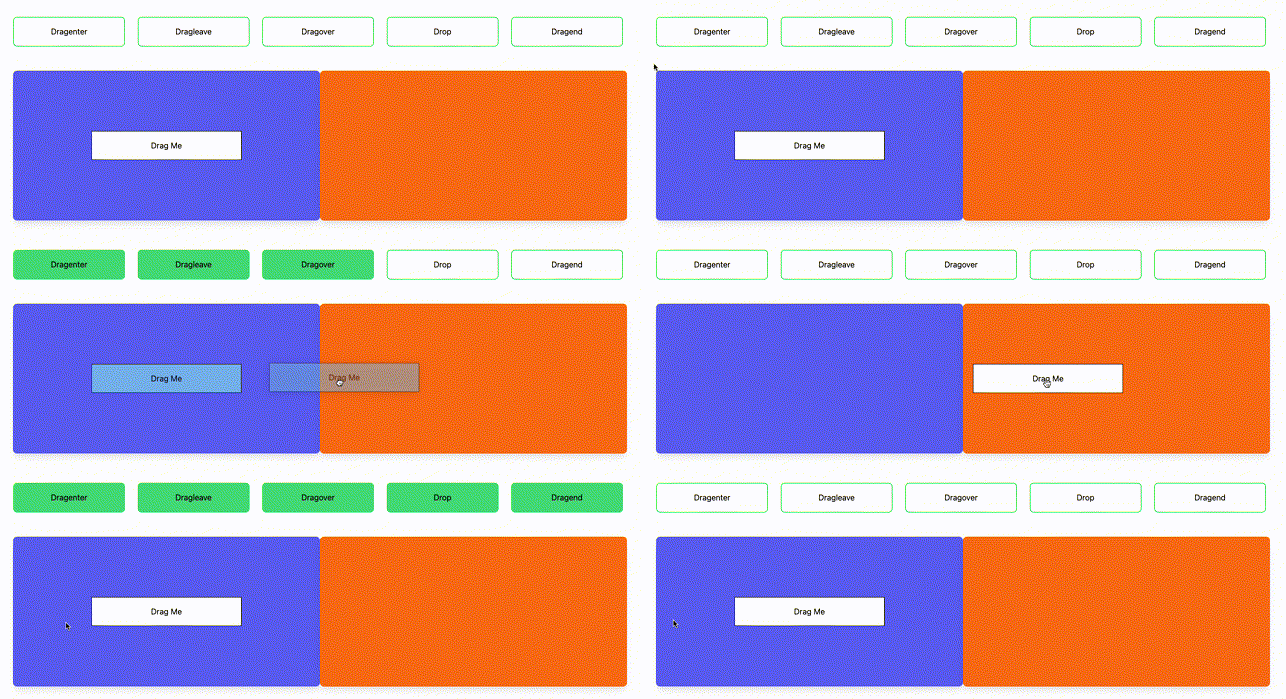
As a visual aid, here is a small example that captures the different drag events as they occur. Try it out here by selecting the “Drag Me” element and move it between the two colored containers to see how and when the events are highlighted.

Usage Example
Now that we have a familiarity of the various drag events. Let’s show an example using this API. This example adds a desirable feature such as the ability to dynamically sort draggable items within a container. Unlike traditional drag-and-drop operations that might place items in a pre-defined or arbitrary order, this functionality ensures that each item is positioned precisely where the user intends.
As a user drags an item over the target container, a “placeholder” appears. This isn’t just any placeholder but a visual cue that accurately reflects the intended drop location. It appears as an outlined area within the container, subtly shifting based on the item’s current position relative to other items. This immediate feedback is crucial for intuitive interaction, letting the user know exactly where the item will be placed upon release.
The result is a fluid and precise sorting experience. Users aren’t just dragging items from one place to another; they’re seamlessly organizing them, with the container intelligently accommodating each new placement based on the item’s drop point. This feature exemplifies how the API goes beyond simple drag-and-drop, offering a more refined, user-friendly way to manage and sort items interactively.
You can try this example out right here

Transferring Data
Dragging items from one spot to another involves keeping track of the information that’s being transfered. By default, the text/plain MIME type is used. However, you can also handle more complex information if needed. For instance, you can transfer data in JSON and later on specifying the same type to retrieve the data after the operation. I typically setup the data transfer at the dragstart and drop events via the setData and getData methods respectively
 event.dataTransfer.setData("application/json", JSON.stringify({"key": "value"}))
 ....other code here...
 const myData = JSON.parse(event.dataTransfer.getData("application/json")),
Conclusion
Drag-and-drop functionality is more than just a nice-to-have feature; it’s a powerful tool that can elevate the user experience of your web application to new heights. By leveraging the Drag and Drop API, you can create intuitive and interactive interfaces that engage users and make your application stand out. I hope this article has given you a good understanding of how to implement drag-and-drop functionality in your next project.
