
While working on an iPhone project for a client, I came across a situation where I needed to test some error conditions returned from a server API which I have no control over. I ended up using Charles Proxy to remote map the server API calls to a locally running Node.js server. Of course the proper way to do this is to write functional tests and mock the networking classes to return the appropriate responses, but that is a blog post for another day.
In this post, I’ll walk through the steps to create a simple iPhone app that interacts with a public API, using Node and Charles to simulate an error response. This post assumes some experience writing iOS code, but all the source code will be available at https://github.com/stevenpsmith/charles-node-blog.
Create an iOS App
For the iOS app, I’ll write a simple weather app that uses the OpenWeatherMap API. We all know the world needs yet another weather app :).
Let’s start by creating a new single view project in Xcode. In my iOS projects I almost always use CocoaPods for dependency management. CocoaPods makes it easy to add/remove 3rd party libraries to your iOS project. In this app, we’ll use AFNetworking to access the API, and I’ll add MBProgressHUD in case the response time is slow and the user needs to wait for UI updates. The following assumes that you already have CocoaPods installed.
After creating the Xcode project, quit Xcode (or close the project) and create a text file named “Podfile” at the root of the project. The contents should include the following:
platform :ios, '7.0'
pod 'AFNetworking', '~> 2.0.3'
pod 'MBProgressHUD', '~> 0.8'
With that file in place, drop to a command line and execute pod install
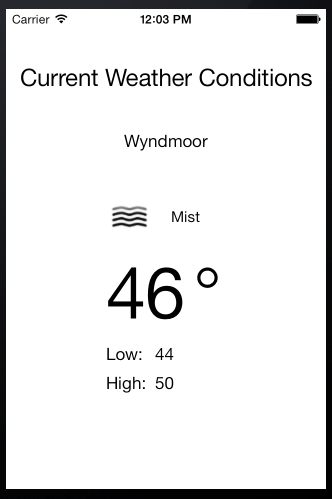
That will create a workspace and configure the libraries. From this point forward, we use the workspace instead of the project. The final version of the application will look like this:
The code base can be found at https://github.com/stevenpsmith/charles-node-blog, but the key portion is the API call, which is below (without all the details)
[[CSMServerAPI sharedInstance] weatherForLongitude:-75.1914
                                       andLatitude:40.1386
    successBlock:^(NSDictionary *weatherDict) {
        // code to map API response to UI elements here
        //...
    } failureBlock:^(NSError *error) {
        //access error message parts from response here
        //....
        NSString *msg = ...
        UIAlertView *alert = [[UIAlertView alloc] initWithTitle:@"Houston - We have a Problem"
                                                        message:msg
                                                       delegate:nil
                                              cancelButtonTitle:@"OK"
                                              otherButtonTitles:nil];
        [alert show];
    }];
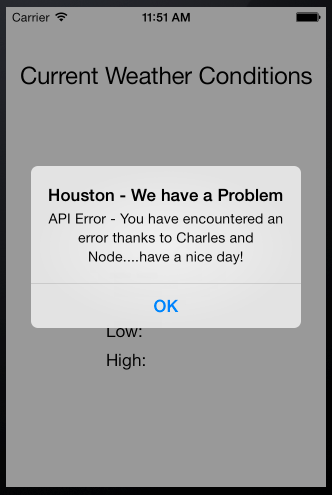
If everything is successful, the UI gets populated with the weather data. But, if there is a failure, we throw an alert up to the user containing the error messages (I know, alerts are not user friendly, but this is an example).
Mocking an error with Node
Now that we have the API calls in place, we need to set up our node server to fake an error response. Sticking with the theme of keeping things simple, I used the express framework for node. With node installed, I created a directory for my server app and added a ‘package.json’ file inside. The ‘package.json’ looks like the following:
{
  "name": "mock-api",
  "description": "for use with charles proxy to mock error conditions for OpenWeatherMap API",
  "version": "0.0.1",
  "dependencies": {
    "express": "~3.4.7"
  }
}
Dropping to a command line and executing npm install will set up the node server with the express module. Now we create an ‘app.js’ file and add our mock API, as follows
var express = require('express');
var app = express();
var errorJson = {error:"API Error",error_msg:"You have encountered an error thanks to Charles and Node....have a nice day!"};
app.get('/weather', function(req, res) {
  	res.json(400, errorJson);
});
app.listen(process.env.PORT || 4730);
Since our call to the OpenWeatherMap API is a get request to the /weather URI, we simply handle that request route in our code and return the response we want, which is an error containing a JSON error message. To start the server, execute node app.js at the command line and the server will be listening on port 4730.
Configure Charles Proxy for Remote Mapping
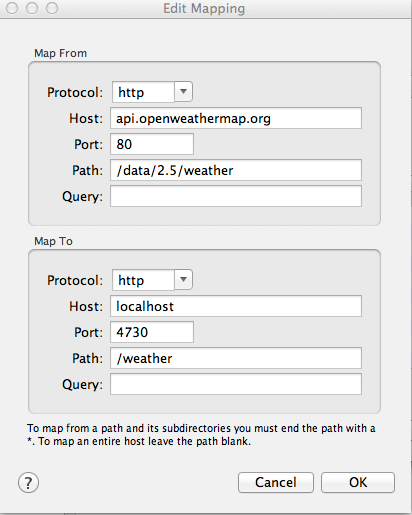
If you code against server APIs and don’t use Charles Proxy, or something like it, you really should start. It is immensely valuable for troubleshooting API calls, and the more I use it, the more nice features I find. I’ve used it for bandwidth throttling, request/response inspection, breakpoints (to change requests or responses), and now URL mapping. In order to map the OpenWeatherMap API to our local node server, access the Map Remote settings via the Tools -> Map Remote... menu. Once there, add a new remote mapping, filling out the fields as shown below. The configuration was also exported and is available at https://github.com/stevenpsmith/charles-node-blog.
With that in place, enable remote mapping, run the iPhone app and get the following error:
If you used Charles to record your network requests, you can even see the mapping occurred in the request overview notes. That’s all there is too it. You can certainly do a lot more than just simulate errors with this set up. I’ve used it to simulate server application errors as well, where server returns an http 200, but the response includes some application specific errors. Timeouts can be tested as well using the connect-timeout module. There is an example in the source code for that too.
So this is one way to intercept your API calls and modify them for testing. This is certainly no replacement for good functional tests, but simply another thing to add to your developer toolbox.