
My motivation for creating tools often stems from a desire to get familiar with new technologies. This project was no different; I wanted to deepen my understanding of Generative AI. However, this wasn’t the primary reason for its creation. The real driving force was a persistent gap in my workflow that I couldn’t ignore any longer.
Every so often I’ll encounter a task that makes me think, “If only this one thing was more like this,” or “If I could somehow use it that way…” These seemingly minor moments add up and can become quite frustrating. Despite this, I usually continue using the available tools, even if they are not perfect. Sometimes, the effort required to improve a tool isn’t justified by the marginal benefits it might bring. In other words, “I’m too busy to deal with this right now.” But this project was different; I saw a potential improvement that I felt compelled to pursue, even if I wasn’t exactly sure how it would turn out.
The spirit of this tool reminds me of when I first started programming. I stumbled upon Python because it was recommended as an easy language to learn. One of the first books I read was “Automate the Boring Stuff with Python” by Al Sweigart. I haven’t looked at it recently, but from what I remember, it was quite a challenging but rewarding book for a beginner wanting to learn Python. I enjoyed it because you were given just enough to get started, but the sample projects at the end of each chapter required you to apply what you learned in meaningful ways.
The concept of automating mundane tasks resonated with me deeply. This mindset has driven many of my projects, including Screen Sniper, the tool this article is about. Screen Sniper captures this spirit because it’s very simple code that automates something immensely helpful to me.
What Problem Does Screen Sniper Solve?
While working on my computer, I often need to add events to my calendar from various online sources. Typically, this involves multiple steps:
- Copy the text.
- Open one of the 2-3 duplicates of Google Calendar/Gmail tabs I usually have open or create a new tab.
- Click the Create dropdown and select Event.
- Paste the text into the details section and cut and paste various parts into the other fields.
- Manually pick the day and times for the event and click Save.
Addressing Mental Overhead with Screen Sniper
The process of manually adding events to my calendar, though seemingly simple, can cause significant mental overhead. This is especially true when dealing with various formats in which events are shared online. People have a lot of autonomy in how they present event information—sometimes it’s just an image, making it impossible to copy and paste text directly. This adds an extra layer of complexity and frustration, particularly when I’m focused on other tasks in my browser.
Enter Screen Sniper. This tool was designed to alleviate that mental overhead by streamlining the process of capturing and organizing event information. Whether the event details are in text or image form, Screen Sniper can handle it. I no longer have to juggle multiple tabs or manually transfer details back and forth.
With Screen Sniper, I simply draw a rectangle around the event information on the webpage, and the tool takes care of the rest. The selected area is captured as an image, and the image is sent to my API server. The API server uses an AI model from OpenAI to extract the necessary details and format it in a way the tool knows how to process into a calendar event. This automation reduces the cognitive load, allowing me to stay focused on more important tasks. Here is a short screencast for more context on what it does.
How Screen Sniper Was Developed
Developing Screen Sniper as a browser extension involved several technical challenges and learning opportunities. I had to familiarize myself with the browser extension development process (currently only tested in Firefox), which included using tools like web-ext for local development and integrating AI capabilities into the extension. This required setting up credentials, obtaining API keys, and ensuring smooth communication between the extension and the API.
To create this browser extension, several files are essential:
- manifest.json: Defines the extension’s metadata and permissions.
- background.js: Manages background tasks and event handling.
- content.js: Interacts with the webpage content.
- popup.html: Provides the user interface for the extension.
Streamlining the Development Process with Web-Ext
Initially, I had to manually reload the extension every time I made a change. This involved:
- Zipping the extension files.
- Going to the browser’s extension management page.
- Removing the old version of the extension.
- Uploading the new zipped version.
After repeating this process several times, I realized there had to be a more efficient way. That’s when I discovered the web-ext tool.
Web-ext is a tool that simplifies the development and debugging of Firefox extensions. It automates many of the repetitive tasks involved in extension development, making the process much smoother. With web-ext, I could:
- Run the extension locally: web-ext allows you to run your extension directly from the command line without manually zipping and uploading it in the browser.
- Live reload: This feature automatically reloads the extension in the browser whenever you make changes to the source code.
- Linting: web-ext provides a lint command to ensure your extension is configured correctly.
Using web-ext significantly improved my development workflow, allowing me to focus more on coding and worry less about managing the extension’s installation and updates. I would consider it to be something similar to ViteJS in the modern JavaScript ecosystem in that it helps with local development but less on the starter templates but more in other areas such as signing and deployment to the Add-Ons store.
API Layer of Screen Sniper
The API layer changed from the prototype to the current version. Initially, I was using a Python package, EasyOCR, to get the text from the image and then sending that text data to the OpenAI completions endpoint. When I showed my project to our AI Lead at Chariot, Sujan Kapadia, who suggested streamlining this process by sending the image directly to OpenAI. I tried it out, and it performed quite well. I will show both examples here:
Initial Version with EasyOCR
from easyocr import Reader
reader = Reader(['en'], gpu=False)

@app.route('/process', methods=['POST'])
def process_image():
    # --- get image from request handled already ---

    results = reader.readtext(image_np)

    extracted_text = ' '.join([res[1] for res in results])
    user_input = f"""
    Extract the following details from the text:
    - Title
    - Start date and time (in the format YYYYMMDDTHHmmssZ)
    - End date and time (in the format YYYYMMDDTHHmmssZ)
    - Description
    - Location

    Text:
    {extracted_text}

    Output in JSON format with keys 'title', 'start', 'end', 'description', and 'location'.
    """

    completion = client.chat.completions.create(
        model="gpt-3.5-turbo-0125",
        response_format={ "type": "json_object" },
        messages=[
            {"role": "system", "content": "You are a helpful assistant. "},
            {"role": "user", "content": user_input}
        ]
    )
Improved version sending the image directly to OpenAI. I will only show the prompt here for brevity.
def extract_event_details(image_base64):
    command = """
    Extract the following details from the image:
    - Title (default to "TODO" if not found)
    - Start date and time (in the format YYYYMMDDTHHmmss, default to "TODO" if not found)
    - End date and time (in the format YYYYMMDDTHHmmss, default to "TODO" if not found)
    - Description (default to "TODO" if not found)
    - Location (default to "TODO" if not found)

    Ensure the output is in JSON format with keys 'title', 'start', 'end', 'description', and 'location'.
    """

    user_input = [
        {
            "type": "text",
            "text": command
        },
        {
            "type": "image_url",
            "image_url": {
                "url": f"data:image/png;base64,{image_base64}"
            }
        }
    ]

    response = client.chat.completions.create(
        model="gpt-4o",
        response_format={"type": "json_object"},
        messages=[
            {"role": "system", "content": "You are a helpful assistant."},
            {"role": "user", "content": user_input}
        ],
        max_tokens=300
    )
As you can see, the API layer is very simple; it pulls out the image data from the request and sends it to the OpenAI API. I use a very specific prompt and request the output to be in JSON. In the next section we will see how the extension uses the generated data.
Broswer Extension Code
Most of the code for the extension is spread across a couple of files, but the most important part is the content.js file. It runs in userland meaning that it runs in isolation so you can’t affect other users using the website but it can access the DOM structure and listen for user actions and events.
In our use case, we listen for a custom event that gets called when I draw the rectangle around the selected area. The custom event received in the background script has the coordinates of the viewable area of the current active tab of the web browser.
Small portion of the draw methods that handle the rectangle selection portion of the screen capture
    startDrawing(event) {
      this.startX = event.clientX + window.scrollX;
      this.startY = event.clientY + window.scrollY;
      this.isDrawing = true;
      this.overlay.style.left = `${this.startX}px`;
      this.overlay.style.top = `${this.startY}px`;
      this.overlay.style.width = "0px";
      this.overlay.style.height = "0px";
    },

    draw(event) {
      if (!this.isDrawing) return;
      this.endX = event.clientX + window.scrollX;
      this.endY = event.clientY + window.scrollY;
      this.overlay.style.width = `${Math.abs(this.endX - this.startX)}px`;
      this.overlay.style.height = `${Math.abs(this.endY - this.startY)}px`;
      this.overlay.style.left = `${Math.min(this.startX, this.endX)}px`;
      this.overlay.style.top = `${Math.min(this.startY, this.endY)}px`;
    },

    stopDrawing() {
      this.isDrawing = false;
      console.log(`Drawing stopped at (${this.endX}, ${this.endY})`);
      this.captureArea();
    },
Example Code for content.js that handles calling the custom event.
{
      browser.runtime
        .sendMessage({
          action: "captureVisibleTab",
          rect: { x, y, width, height },
        })
        .then((response) => {
          if (response.error) {
            console.error("Error capturing tab:", response.error);
            return;
          }
          const screenshotUrl = response.screenshotUrl;

          fetch("http://localhost:5001/process", {
            method: "POST",
            headers: {
              "Content-Type": "application/json",
            },
            body: JSON.stringify({
              image: screenshotUrl,
              rect: { x, y, width, height },
            }),
          })
            .then((response) => response.json())
            .then((data) => {
              const { title, start, end, description, location } =
                data.structured_data;
              const startFormatted = this.convertToLocalTime(start);
              const endFormatted = this.convertToLocalTime(end);
})
The mentioned background script calls the wonderful browser extension capture visible tab API.
browser.runtime.onMessage.addListener((message, sender, sendResponse) => {
  if (message.action === "captureVisibleTab") {
    const { rect } = message;

    browser.tabs
      .captureVisibleTab(null, {
        format: "png",
        rect: {
          x: rect.x,
          y: rect.y,
          width: rect.width,
          height: rect.height,
        },
      })
      .then((screenshotUrl) => {
        sendResponse({ screenshotUrl });
      })
      .catch((error) => {
        sendResponse({ error: error.message });
      });

    return true; // Indicates you wish to send a response asynchronously
  }
});
Now that the image is processed by the API layer the last step was to generate the calendar event.
Generating the Calendar Event
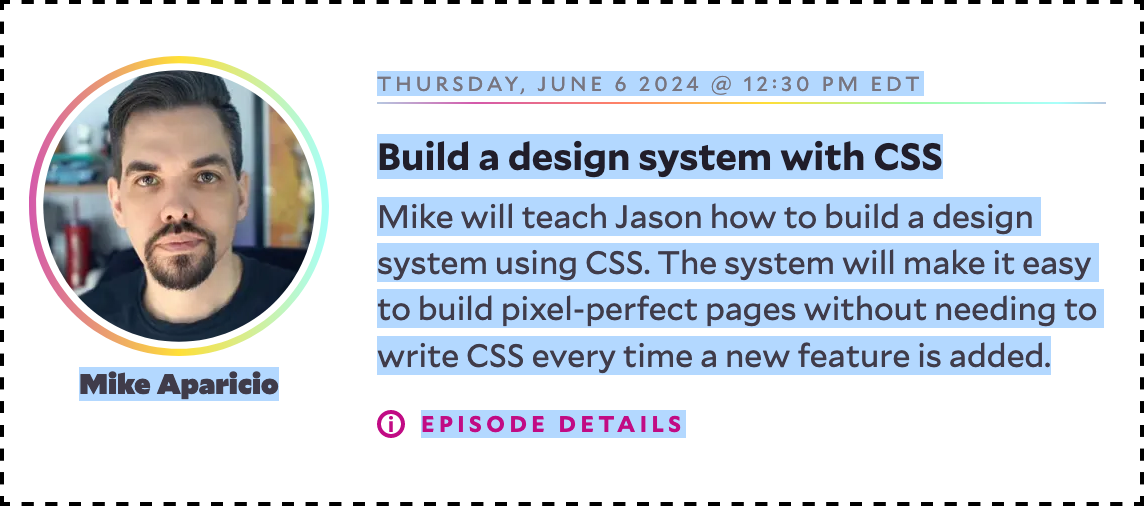
As you can see in the code snippet below I am using a template and filling in the placeholders with data from the API. Here is an example from the demo where I capture the following snippet from the www.learnwithjason.dev/schedule website.
const calendarUrl = `https://calendar.google.com/calendar/event?action=TEMPLATE&text=${encodeURIComponent(title)}&dates=${startFormatted}/${endFormatted}&details=${encodeURIComponent(description)}&location=${encodeURIComponent(location)}`;
// API response:
{
    description: "Mike will teach Jason how to build a design system using CSS. The system will make it easy to build
                  pixel-perfect pages without needing to write CSS every time a new feature is added.",
    end: "20240606T123000",
    location: "TODO",
    start: "20240606T123000",
    timezone: "UTC",
    title: "Build a design system with CSS"
}
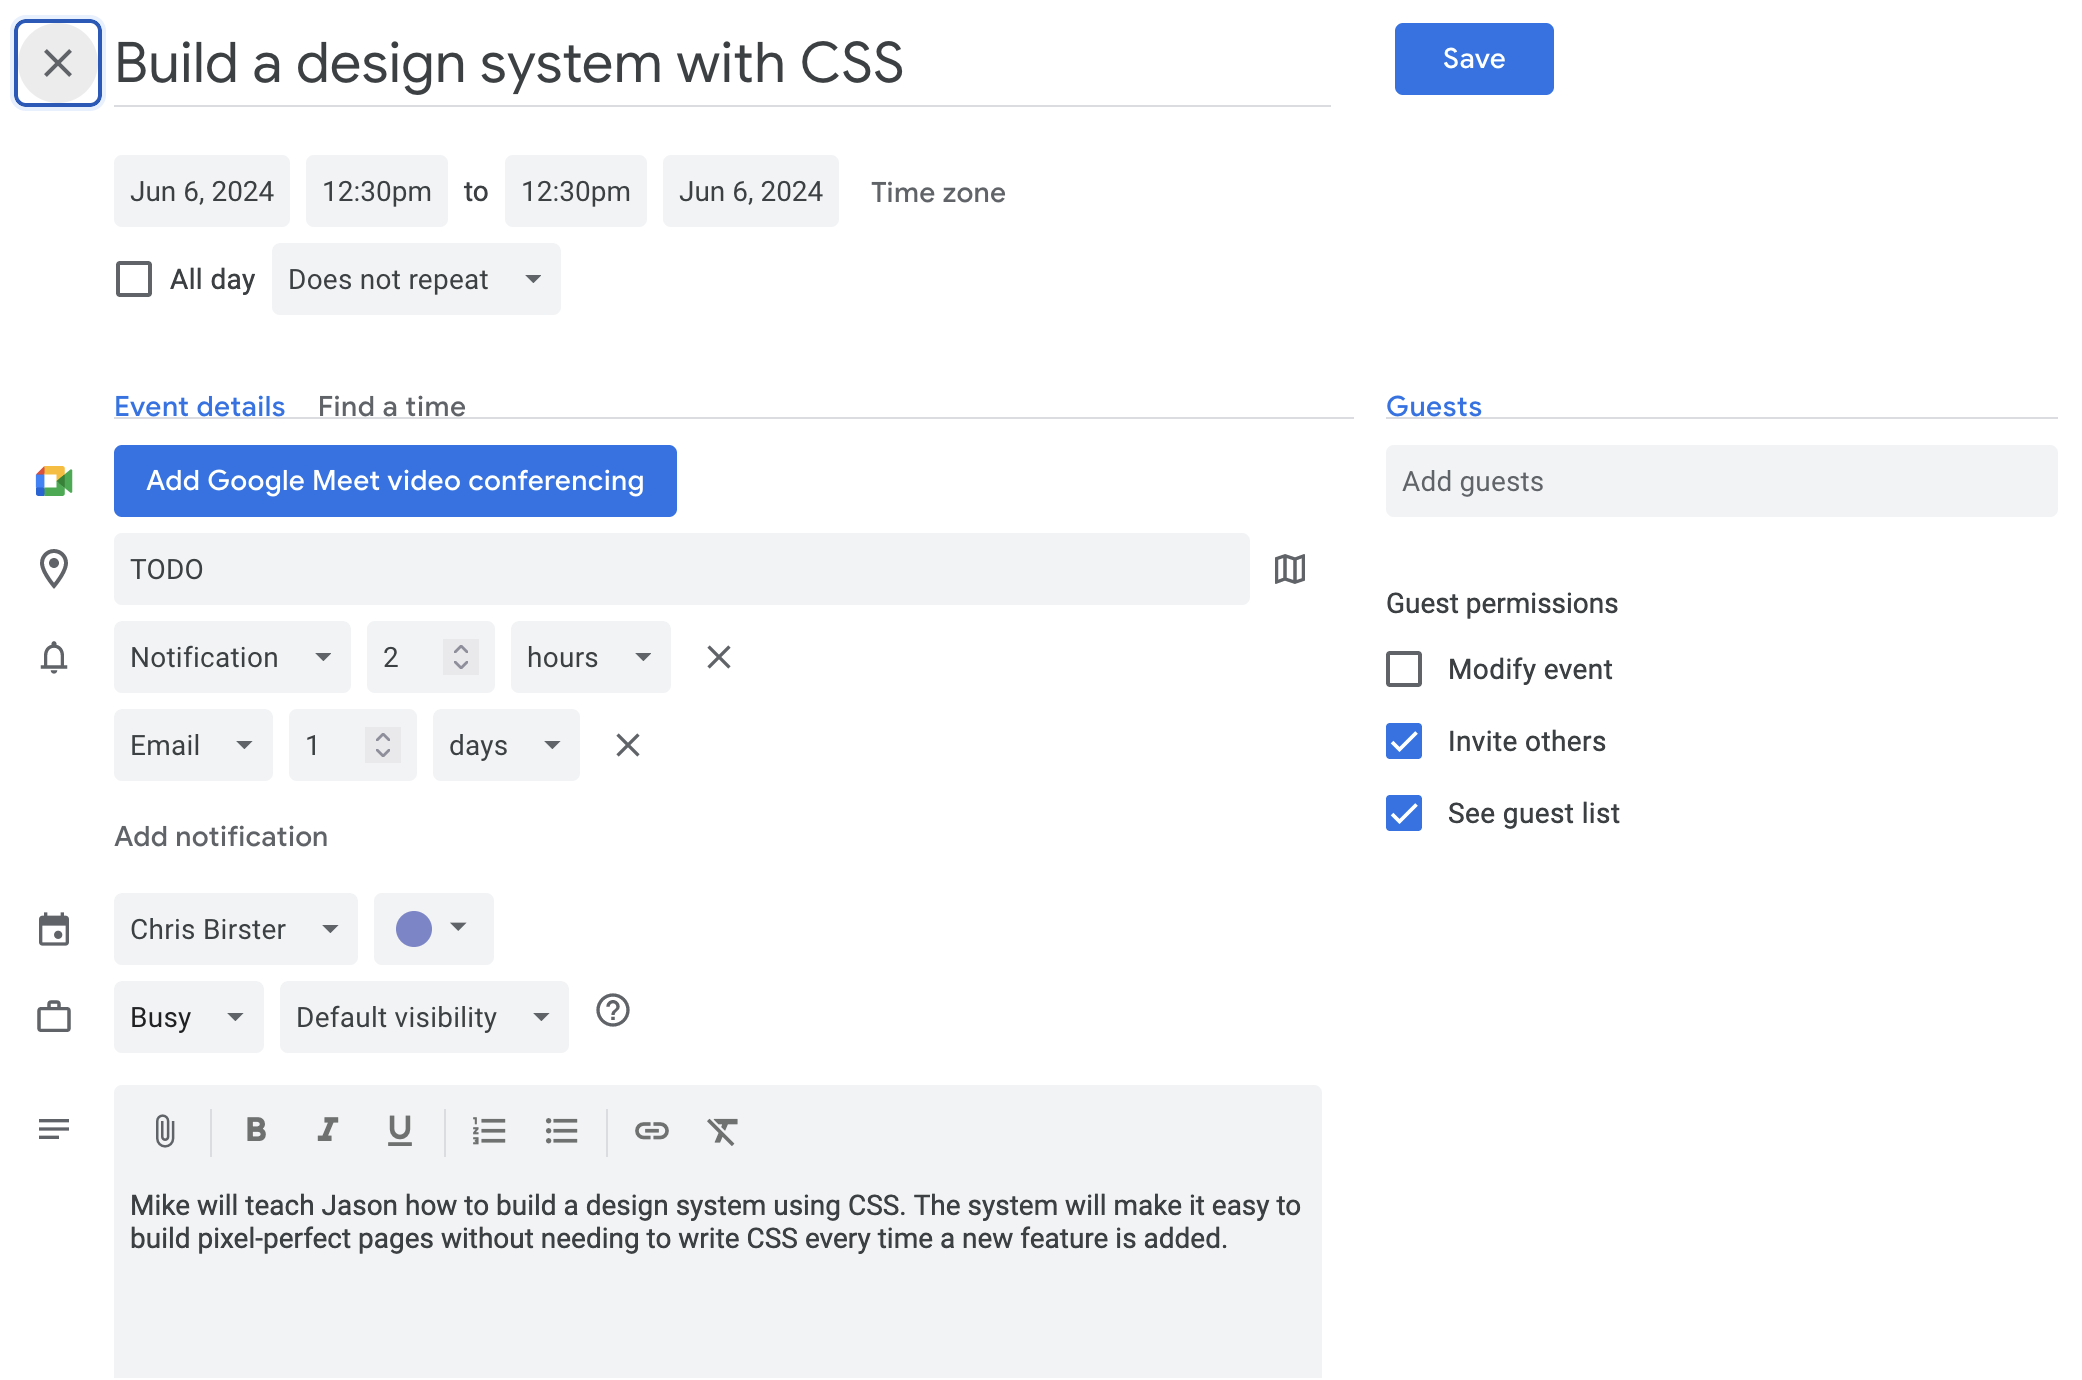
This is the captured data from the API when I sent it this image and the following event it created in my Google calendar
From the user perspective I just perform a quick swipe and a couple seconds later I have a new tab with everything filled out. I like the user experience so far and I can even assign a shortcut to the manifest file for this behavior if I wanted. If the API can’t find a reasonable value for the “location” as shown in the example it will just keep that part filled in with “TODO”. The image captured didn’t have a location defined so that looks acceptable to me. All I have to do now is click Save.
If you would like to try it out here is the link to the calendar event that was generated. You must be signed in to Google Calendar app for it to show.
Further Iterations
I started off with using an OCR library and using the “gpt-3-turbo-0125” OpenAI model for the API layer and then switched to sending an image directly via “gpt-4o” model. I also see there are a lot of image-to-text models on Hugging Face that I could use as well. I may explore other models to see what they have to offer. Another area I would like to improve is capturing dates from images and some styling for the extension UI.
It demonstrates how even simple tools can leverage advanced AI models to streamline workflows and reduce manual effort. As I continue to iterate on Screen Sniper, I look forward to integrating more sophisticated features and sharing my learnings with the developer community. This project has not only enhanced my understanding of AI and browser extensions but also reaffirmed the value of creating tools that solve real-world problems efficiently.
Resources
Web Extensions
Add Event to Calendar Documentation
OpenAI Chat API
Automate the Boring Stuff
Web-Ext CLI
Learn With Jason
Screen Sniper project on Github
Hugging Face image-to-text models
Add-Ons store